

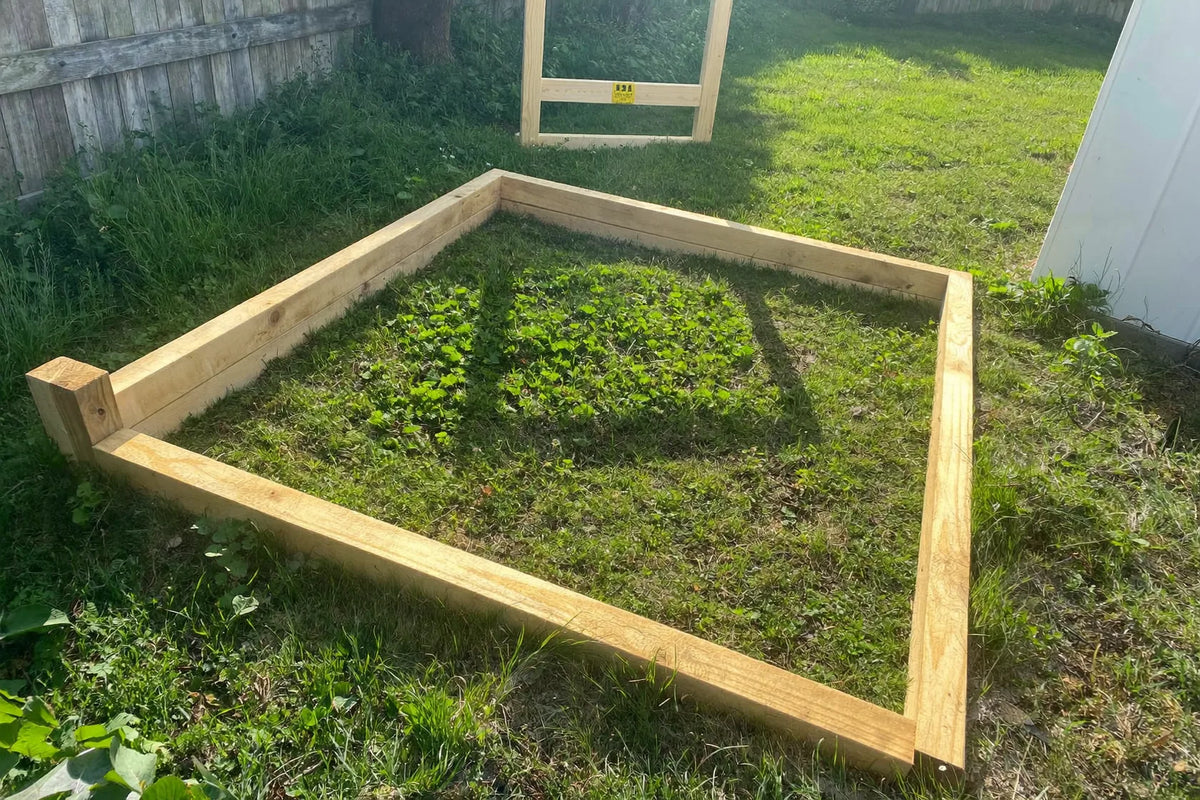
Learning how to build a chicken coop is mostly learning the order to decide things in. Five stages, always the same: the site, the floor frame, the wall frame, the cladding and roof, then the fit-out. Each one closes a decision the next cannot reopen. Spend your time on the floor, because every interior figure the extension services publish is measured up from it — Penn State puts perches 18 to 24 inches above the floor and nests 2 feet up and 4 feet away from them. If you would rather those decisions arrived already made, that is what a coop kit is.
Every height, spacing and floor area below is taken from the four small-flock housing publications named at the foot of this page — read in full, including the two that share an author — and where a coop listing goes quiet on an interior dimension, we go and ask its maker for it.
How do you build a chicken coop?
In five stages, in a fixed order: the site, the floor frame, the wall frame, the cladding and roof, then the fit-out. The order is not a preference. Each stage closes a decision, and the stage after it cannot reopen that decision without undoing work.
Our free plans guide already publishes that order — site and level, frame the floor, walls, roof, then wire and internal fittings. What no plan sheet carries is the second column: which decision each stage takes off the table, and what it costs to change your mind afterwards.
The test for whether a decision has closed is blunt. If reopening it needs a screwdriver, it is still open. If it needs a saw, it has closed. If it needs a saw and a trip to the yard for more material, it closed some time ago and you have only just noticed.
The screwdriver-or-saw test sorts a build the way an invoice sorts a purchase. The first-coop guide does the buying half — what is fixed the moment a coop is delivered, and what you can add later. A build splits the same way, but along the calendar of the work rather than the order form.
What to settle before the first cut
Four things, and not one of them is a cut list: how many birds, where the coop will stand, which way its openings will face, and the enclosed floor area those three produce. Settle them in that order and the drawing almost falls out of them.
The floor is the one to labour over, because it is the datum for everything a bird uses. Every height the extension services publish for a fitting a hen touches is measured up from the coop floor. Penn State puts roosts 18 to 24 inches above the floor and nests at least 2 feet off the ground. Minnesota starts roosts at least 12 inches above the floor. New Hampshire's tiered perches sit at about two, three and four feet above the floor. Penn State sets the top lip of feeders and waterers at the bird's own back height, which is the floor again with a hen standing on it.
Not one of those heights is taken from a wall, a roof or an eaves line. The single fitting positioned from above is the electric light, which Penn State puts at ceiling height and our guide to what goes inside a coop covers in full.
Some published figures are not heights at all. Penn State's 3 inches of feeder space per bird, its 12 by 12 inch nest box, the foot it leaves between roosts and the 4 feet it puts between roosts and nests are lengths between things you are placing. They tell you how far apart, never how far up.
So the floor is the surface every other figure hangs off, and it is settled first. Get it wrong and every height, every clearance and every gap you worked out carefully is wrong with it — not because the arithmetic changed, but because the surface you measured from did.
- The flock, two years out. Not the chicks in the box. Floor area is the one figure in the build with no retrofit.
- The patch of ground. Reach decides this as much as drainage does. If you cannot stand somewhere and get an arm to the far corner, you will be crawling in every week for years.
- The direction the openings face. The published guidance gives a direction and never an area. Our ventilation guide has that convergence in full.
- The enclosed floor area. The three published space figures disagree — 1.5, 3 to 4 and 3 to 5 sq ft per bird — so pick one deliberately and write down which. The size guide and the capacity study carry the arithmetic.
Where do the published numbers bind the build?
Unevenly, and the unevenness is the useful part. Two of the five stages have published figures sitting behind them, three do not, and the stages without a number are the ones whose work happens into a wall that is already finished.
| Build stage | The decision it closes | Is there a published figure? | What a change costs afterwards |
|---|---|---|---|
| Site and orientation | Reach, and the direction the openings look | No. The published guidance gives a direction, never a dimension | Moving the whole coop |
| Floor frame | Enclosed floor area — and every height measured up from it | Yes, and they disagree: 1.5 to 5 sq ft per bird | A second coop |
| Wall frame | The opening a person gets in through, and what a perch can screw to | No. The published instruction is to build for easy access and to make every area cleanable | Opening a finished wall back up |
| Cladding and roof | The pop-hole and the vent openings | No figure for either, from any service in this library | Cutting into cladding that is already on |
| Fit-out | Roost, nests, feeder line | Yes: Penn State's 6 inches of perch per standard bird, 12 by 12 inch nests, 3 inches of feeder space | A screwdriver and an hour |
Read the third column downward and the pattern is uncomfortable. The two decisions no service in this library has published a number for — how big the bird's door is, and how much vent area a coop needs — are the two you cut last, into a wall you have just finished. Our coop doors guide and door sizing guide collect the pop-hole numbers that do exist, all of them manufacturers' rather than any service's, and the ventilation guide does the same for air.
The human opening is the quietest of the three. No service in this library publishes a width, a height or a sill for the door a person uses; the published instruction asks instead for a building you can reach into and clean throughout. A requirement with no dimension means you supply the dimension — with a tape, standing where you will actually stand, before the studs go in.
Five decisions, five weekends, and the wall you cut the pop-hole into is the one you just finished. Take 10% off a coop that arrives with all five already settled. GET MY 10% CODE
How to build a chicken coop: the instructions a plan sheet leaves out
A plan sheet is a geometry document. It gives lengths, angles, a cut list and, if it is a good one, a stated order of work. What it rarely gives is the set of checks that happen between stages, at the moment one decision closes and the next opens — and those handoffs are where a build goes wrong quietly.

Three checks, at three handoffs. Each takes minutes; each is unrecoverable if you skip it.
- Before the walls go up, square the floor. Measure both diagonals of the floor frame and make them equal. A frame out of square stays out of square through every stage above it, and you find out when a door will not shut.
- Before the cladding goes on, get in. Stand where you will stand and reach where you will reach. Virginia states the instruction plainly: "When building a poultry house or modifying an existing structure to house poultry, use common sense in designing the structure." Check the perch positions at the same time — New Hampshire is the only source in this library that says where a perch attaches, which is to the walls, a reading our A-frame guide published first.
- Before the roof closes, decide the air and the light. Vent openings and any cable run are easier to place while the structure is open. Penn State is explicit about where roosts must not go: "Place roosts away from nesting areas to prevent the birds from nesting in the nesting boxes." Moving a roost later is a screwdriver job; moving a vent is not.
For reading the drawing itself — what a good plan states, and what the price of one buys — our coop plans guide does that job and this page does not repeat it.
What does building a basic chicken coop have to include?
A basic coop is not a small coop. It is one that clears the published requirement list with nothing added, and Penn State prints that list plainly: "Poultry housing can be as crude or elaborate as you wish to build as long as you provide the following". What follows is ten named headings: the specification a build has to satisfy.
- Protection — from weather, predators, injury and theft.
- Adequate space — the published sq ft per bird, inside and in the run.
- Perches — six inches per standard bird, off the floor, away from the nests. Our roost guide has the heights.
- Nests — at least 12 by 12 inches, and enough of them. Our nest box guide has the counts.
- Easy access to feed and water — at least 3 inches of feeder space per bird, reachable.
- A source of light — conditional, in Penn State's own framing: you need one if you want eggs year-round.
- Ventilation — ample air movement without a draft, a requirement with no number.
- Appearance — Penn State's reason is the neighbours, and the ordinances they can trigger.
- Storage — somewhere dry for feed and somewhere to hang the tools.
- Common sense — build it so you can clean every part of it.
New Hampshire adds the minimum opening count in one sentence: "There should be a door and at least one window, preferably on the south side of the coop." Minnesota opens its housing section with "A quality coop is essential to backyard chicken production" and then asks for weather protection, predator protection, nest boxes at one per four to five birds, somewhere to roost, ventilation, and 3 to 5 square feet of indoor space per bird.
What none of them does is name a shape. No service in this library says an A-frame beats a hoop or that a walk-in beats a raised house, and the two published sentences that come closest to design advice belong to our buying mistakes guide, which quotes them in full. A basic coop is defined by what it provides, not by what it looks like.
Chicken coop building plans for sale: what a price settles and what it cannot
A paid plan settles geometry. Lengths, angles, a cut list, a materials list, and usually a stated order of work — those are the things you are buying, and on a good sheet somebody has built the thing once before selling you the drawing of it.
What no plan settles, at any price, is the first two rows of the table above. A plan cannot know how many birds you will keep, which patch of ground it goes on, or which way the yard lets the openings face. Those arrive from your side, and they are the inputs the geometry is meant to serve. Buy the drawing after you have written them down, not before.
Scale is where the free-and-paid question gets interesting. Virginia Cooperative Extension is the only service in this library that publishes house plans at all, and its smallest is drawn for 15 to 20 hens — a finding our 12-hen coop guide published first. So a backyard plan for four birds is somebody's own drawing rather than an extension design: not a reason to avoid it, only a reason to check it against the requirement list yourself.
For what separates a good sheet from a bad one, our coop plans guide and the free plans PDF are the two pages to read before you pay for anything.
Should you build at all, or adapt a building you already have?
Both published small-flock housing guides answer that before they show you a single drawing, and both answer it the same way: adapt something that already stands. Penn State's opening paragraph reads "Many existing buildings can easily be adapted to accommodate poultry." Virginia's introduction goes further — "Rather than building a new coop, existing buildings can easily be adapted to accommodate poultry."
One shared author explains the overlap. Phillip J. Clauer is an author of both publications, and the two pages reuse whole sentences from each other, so what you are reading is one recommendation printed twice rather than two services independently reaching it. Worth saying out loud, because it means the field has one published opinion here rather than three — and Virginia prints that recommendation a second time at the head of its own plan set, a line our modern coop guide quotes in full.
Our own position is narrower, and it comes straight out of the sequence. Adapting inverts the order. In a new build the five decisions arrive one at a time, each with a moment where it is still cheap; in a conversion the site, the floor and the walls arrive already decided, together, and what is left is the openings and the fit-out. The fit-out is the easy half — screwed to a wall, published figures behind it. The openings are the hard half, and they carry no published figure at all. Adapting is faster and usually cheaper. It also spends your whole budget of judgement on the hardest decisions and none on the easy ones.
If the building you are adapting is a coop you bought rather than one you built, screw holes and saw cuts do not un-drill. Check the manufacturer's warranty terms before you cut an opening into a panel or drive a fixing through a roof covering — tell us which coop you are converting and we will get its maker's ruling on both jobs first.
The cost of being wrong runs in opposite directions. Build badly and you lose a weekend and a stack of timber, which is recoverable. Adapt badly and you get a building that houses birds perfectly well and that you cannot reach into — a cost you pay every week for as long as you keep hens. For the shed-conversion arithmetic, our DIY coop guide has already done that work.
The decisions a bought coop has already made
Nearly all of them, and they arrive together. A finished coop turns up with its floor area, its openings and most of its fittings already decided by the maker — the exact reverse of a build, which takes those decisions one at a time.
The site is the one decision that does not arrive already made, and it is still the stage with no published dimension behind it. Level ground, a direction for the openings, and room to stand where you will need to stand: those are yours whether you built the coop or unwrapped it. Everything above them is settled for you: either the appeal or the objection, depending on how much you like a saw.
A bought coop still leaves you one decision from the build list: how much of it you assemble. That answer is usually compressed into a single phrase in the listing — "pre-drilled", "pre-labeled parts", "bolt-together", "step-by-step instructions". Hunt for one of them before you order, because a panel drilled on a factory jig arrives square and a panel you drill in the garden arrives however you held the drill. Where the listing is quiet about an interior figure instead — a perch length, a vent opening, a pop-hole height — write to `sales@moveablechickencoop.com` with the coop and the figure you want, and it becomes our question to put to the maker rather than your guess. Our DIY coop guide carries the wider audit of what makers disclose about assembly.
If the five stages above read like five weekends you do not have, that is a reasonable conclusion and it is the whole reason a finished coop exists. The same five decisions arrive already made in a flat-pack coop kit, and the versions that come with the run already framed sit on the coops with runs page.
Waiting for an answer from us is not a prerequisite. Measure the patch of ground, settle the flock size, and the full range of coops sorts itself from those two numbers — the same two a build would have started from.
Sources: Penn State Extension, “Small Scale Poultry Housing” (Gregory P. Martin, Ph.D., PAS, and Phillip Clauer; updated June 25, 2026) — the ten-requirement list, Table 1 minimum space, perch and nest positions, feeder space — accessed August 21, 2026, read from raw bytes · Virginia Cooperative Extension 2902-1092 (APSC-186NP), “Small-scale Poultry Housing” (Leonie Jacobs and Phillip J. Clauer) — the adaptation recommendation, the design instruction under Use Common Sense, and the three house plans — accessed August 21, 2026. This publication shares an author with the Penn State page above and reuses whole sentences from it, so the two are treated here as one text printed twice rather than as independent agreement · University of Minnesota Extension, “Raising chickens for eggs” — the housing paragraph, indoor space per bird and nest-box ratio — accessed August 21, 2026 · University of New Hampshire Extension, “Producing Your Own Eggs” (Kendall Kunelius) — the door-and-window minimum, floor space per bird and the tiered perch heights — accessed August 21, 2026.
Frequently asked questions
How to build a chicken coop for beginners?
Start with decisions, not lumber. Settle the flock size, the patch of ground, the direction the openings face and the enclosed floor area, in that order, before you cut anything. Then build upward in five stages: floor frame, wall frame, cladding and roof, then fit-out. The expensive error is not a crooked cut, which can be re-cut, but a floor sized for the chicks in the box, which has no retrofit at all.
How to build a chicken coop step by step with pictures?
Photo sequences are good at showing joints and bad at showing decisions, which is where builds go wrong. Use one for technique — how a corner goes together, how cladding laps — and a dimensioned drawing for everything else. Our free plans PDF carries drawings and cut lists; the order to work in is site, floor frame, wall frame, cladding and roof, then fit-out.
How to build a chicken coop from scratch?
From scratch means you also buy the tools, prepare the ground and make every decision yourself, in the order the stages close them. Worth knowing before you commit: both published small-flock housing guides open by suggesting you adapt an existing building instead, and they share an author, so that is one recommendation printed twice rather than two services agreeing on it.